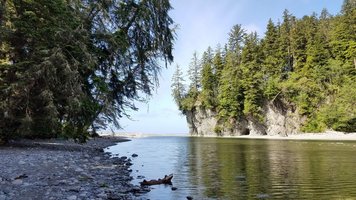
I recently returned from hiking the West Coast Trail on Vancouver Island, BC. The trail is 75km and follows the coast, sometimes requiring hiking on the beach. It was a tough trip, but pretty amazing. We were scheduled to do the hike in 6 days, but day 5 was very rainy, so we decided to push through to get off the trail a day early. We hiked from south to north, starting at Port Renfrew and going to Pachena Bay. Below is a list of the gear that I brought with me, along with notes and comments.
Pack: ULA circuit (www.ula-equipment.com) This was a new pack for me, and I really liked it a lot. One of my main drivers on this trip was to keep weight down as much as practical (I don’t recover as quickly as I used to), and this was a great pack to that goal. It was lightweight, but still had the internal structure to give me the support I needed. The side pockets were big enough to fit my tent in one and two SmartWater bottles in the other. The pack seems pretty durable, and I didn’t have any issues during the trip.
Tent: Big Agnes Fly Creek UL1 At just over 2lbs, this tent is super lightweight. It is pretty easy to set up, and was big enough to fit me (6’2”)… but just barely. This is probably the only piece of gear I will swap out on future trips, but here are some pros can cons as I see them:
Pros:
· Lightweight, compact – I hiked with it in one of the side pockets on my pack
· Small footprint meant I could set up where other tents couldn’t
· Interior stayed dry during light/moderate rain
· Easy to set up with single pole system
· Freestanding
· The stakes they provide seem of good quality. However, I knew we were going to be camping on sand so I swapped them out for my MSR Groundhog stakes, which worked really well
Cons:
· Single door at the end was annoying. It meant that I had to crawl part way in, take my boots off, and then turn around in a tight space.
· The vestibule was on the small side – it barely fit my pack and boots
· You have to stake out the ‘foot box’ to use all of the footprint. I’m not sure if my bag would have gotten wet had I not staked out the foot box, but I never wanted to take the risk.
Sleeping bag: Sierra Designs down bag, 20°F rating. I’ve had this sleeping back for a very long time and I still like it. I’m guessing it’s heavier than more modern bags, but I couldn’t justifying buying a new bag when this one is still in great shape and it was the right bag for the expected temps (lows in the mid 30’s to upper 40’s°F). I put this bag in a Sea to Summit compression dry sack (below) and never had any moisture issues.
Sleeping pad: Big Agnes Air Core Ultra 20 x 78. In the past I’ve primarily used a Thermarest ‘self inflating’ style pad (the variety that ends up being about an inch in thickness), but as I’ve gotten older I was starting to end up with my back being in spasm in the morning. This pad was great. Yes, you have to inflate it, but that task usually only took a couple of minutes. I didn’t go with the insulated version of this pad primarily for weight savings, and I didn’t have any issues being cold. I don’t roll around a ton in my sleep, so rolling off the pad wasn’t an issue for me (some pads have ‘bumpers’ to help keep you contained). It is generally pretty easy to get this thing stowed away in the morning, though a few occasions it took me a little bit to get all of the air out of it.
Inflatable pillow: Klymit pillow X Overall, a decent pillow. It’s only 1.95oz and actually kept its shape, unlike the stuff sack full of clothes that I usually used as a pillow. The only thing I would have changed was to bring some sort of pillow case to make it a bit softer.
Stove: Soto Windmaster This stove screws onto pressurized IsoPro fuel canisters and comes with a four-leg pot support. I had previously used stoves with separate fuel bottles, but this system was a lot smaller and lighter than my MSR Whisperlite stove. The stove has an integrated piezo igniter and works great. It was fairly windy for most of the trip, and I never had any issues getting this stove lit and keeping it lit.
Pot: SnowPeak Hybrid Summit cookset I was only eating dehydrated meals on this trip, so I only needed a pot that could hold 2-2.5 cups of water. I had two potential pots to bring with me on this trip, and ended up bringing the SnowPeak pot (see additional post below) to save on weight. It worked just fine. I didn’t bother bringing the silicone cup that fits on the bottom of the pot because I wasn’t planning on making any hot drinks. The handles of the pot never got too hot to hold with my bare hands, so I didn’t use the silicone lid for anything other than a lid. The lid was the only negative about this set – on more than one occasion it slipped into the boiling water. It wasn’t really a big deal, just kind of annoying that I had to fish it out. Otherwise, no complaints. My stove and 110g fuel canister both fit into the pot, so that was handy.
Spoon: I used a long-handled plastic spoon from REI for mixing and eating my dehydrated meals. My friends all had shorter spoons and definitely suffered from spoon envy.
Water filter: MSR Sweetwater I’ve used this model of water purifier for over 20 years, and I’ve never had any issues with water-borne illnesses. Yes, it is bigger and heavier than the Sawyer filters or life straws, but the throughput and the fact that I can use it with pretty much any fresh water source makes me stick with it.
Water bottles: I just used SmartWater bottles on this trip. They are way lighter than my usual Nalgene bottles and were plenty durable. I brought a couple of extra caps with me in case I lost one, and drilled a hole in one cap and glued it onto the outlet hose of my water filter. That worked really well, and meant I could ditch the heavier adapters that come with the water filter.
Bags and sacks: For my clothes and sleeping bag, I used Sea to Summit compression dry bags. They worked great, even when we got steady, heavy rain, and were pretty lightweight. For my food, rain gear, and odds n ends, I used Z packs dry bags. They aren’t cheap, but they are super lightweight, durable, and waterproof.
Medical kit: I went minimalist for this trip, only bringing Advil, bandaids, steristrips, moleskin, and a small pair of shears. I used the moleskin and Advil, but that was it.
Trowel: deuce of spades I think I went with the middle-sized trowel (the #2). This thing weighs next to nothing and was good at digging holes. I did put some hockey stick tape on the handle because the aluminum is so thin. I didn’t actually have to use it much, as every campsite had a composting outhouse.
Other odds and ends: storm whistle, ESEE Izula II knife, Nuun electrolyte tablets, 50ft of 1.5mm cord, Z packs backpack cover, rain jacket, rain pants, lighter, Anker power bank, Write in the Rain small notepad and Fischer pen, Petzl headlamp and extra AAA batteries, LEKI trekking poles, OR gaiters (which I didn’t really use), REI medium size travel towel (also didn’t get used as it was too cold to go swimming)
Things I forgot to bring: grocery bag for trash, sunscreen (bummed some from my friends), small amount of duct tape (wouldn’t have used it, though), ???
I'll update as I think of anything else, or in response to questions.