sunlu pla+ is on sale - $14.69. meta is also on sale, $13.16. both are very good.
Amazon product ASIN B08CVG2RVPView: https://www.amazon.com/dp/B08CVG2RVP
Amazon product ASIN B08CVG2RVPView: https://www.amazon.com/dp/B08CVG2RVP
If you enjoy the forum please consider supporting it by signing up for a NES Membership The benefits pay for the membership many times over.
Be sure to enter the NES/Pioneer Valley Arms February Giveaway ***Smith & Wesson SD9VE 9MM***
did you put accelerometer on the sprite itself? what did you do with klipper?update to a Creality Sprite extruder and klipper was definitely a good move
Haven't done the automated vibration yet - need to wire up the cable.did you put accelerometer on the sprite itself? what did you do with klipper?
my grief with it - as i understand it - the klipper implementation will render the control unit/display of the ender printer useless - and i use it all the time. i do not want it to be without any manual overrides, over the web only.
i have no problem with linux, but hesitant to break a setup that works so well now. or may be i`ll try it. will see.Haven't done the automated vibration yet - need to wire up the cable.
No screen isn't as much of a problem as I thought it might be - control from a cell phone is fine and you can add an HDMI touch screen if you want.
With Klipper the host not the printer is the controller - the printer's controller doesn't process g-code and becomes a simple hardware interface. If it doesn't get a heartbeat from klipper it shuts everything down.
Much better than Octoprint but does take some Linux knowledge to do easily.
 www.klipper3d.org
my dilemma with the whole thing is - i cannot find nothing at all online with factual detailed comparisons of the outcome, something that would demonstrate the quality/speed differences between last marlin 2.1.1 versions on 32bit boards and klipper. and all i saw about klipper just reeks unpredictability way more than marlin does. not clear how to setup it correctly, what parameters to tune afterwards, the printer cfg files need to be customized somehow for cr touch, pins set to something.Measuring Resonances - Klipper documentation
Doing it on a bed slinger is more complicated because x and y have be done separately but it's not hard.
Don't even need the accelerometer to do the input shaping but it's easier and more accurate with it
I haven't switched my old 8-bit Ender 3 over to klipper yet. Will most likely wire on power control to the bigger printer first so I don't have to go to the basement to turn it on before printing or have to remember to go down and shut it off later.
My tronxy has a 32 bit board.my dilemma with the whole thing is - i cannot find nothing at all online with factual detailed comparisons of the outcome, something that would demonstrate the quality/speed differences between last marlin 2.1.1 versions on 32bit boards and klipper. and all i saw about klipper just reeks unpredictability way more than marlin does. not clear how to setup it correctly, what parameters to tune afterwards, the printer cfg files need to be customized somehow for cr touch, pins set to something.
plus, i can understand reasoning behind the upgrade of 8bit older platforms, the new 32bit silent boards now should not be resource shy to push data at any proper speeds. dunno.
my dilemma with the whole thing is - i cannot find nothing at all online with factual detailed comparisons of the outcome, something that would demonstrate the quality/speed differences between last marlin 2.1.1 versions on 32bit boards and klipper. and all i saw about klipper just reeks unpredictability way more than marlin does. not clear how to setup it correctly, what parameters to tune afterwards, the printer cfg files need to be customized somehow for cr touch, pins set to something.
plus, i can understand reasoning behind the upgrade of 8bit older platforms, the new 32bit silent boards now should not be resource shy to push data at any proper speeds. dunno.
i have a second one, it is a whole point.If you have a printer you're happy with, don't change anything. Get a second printer and set that up with Klipper, don't change it if it's not broken!
If you're trying to get to really fast speeds and you're seeing resonance effects, then yes you can go ahead and switch. Although even then I would still say to get a second one and leave the working one alone.
") i found a reddit guide to it even, but, dunno.
i found a reddit guide to it even, but, dunno.mostly, i absolutely hate the idea of losing LCD and local controls.
ok. here we go. maybe we can do it here this way - where i am right now - this test fileMy tronxy has a 32 bit board.
On marlin the sprite extruder ran well.
With octoprint remote printing was easier.
With klipper, remote printing is easy. Tuning is effortless and the quality is better (likely due to very precise step tuning versus marlin)
If marlin/octoprint work for you then there's little reason to change.
For me I already had something that simply doesn't exist elsewhere, a tronxy X5SA Pro with a BL Touch and a creality sprite extruder. I was already deep into the pins file in marlin to get things running right.
 www.thingiverse.com


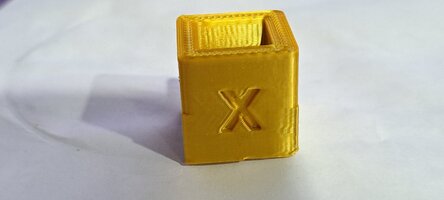
just wanted to confirm with you - i pulled it from some reddit post about sprite pro setup - did you use same settings?Edit: These are on my Tronxy corexy printer. I don't think a bed slinger can keep up, especially if the model is bigger
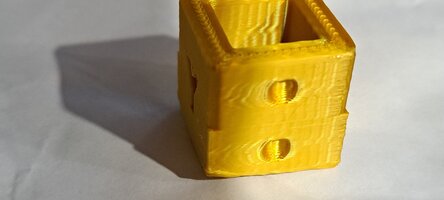
16 minutes @ 0.24 & 0% infill
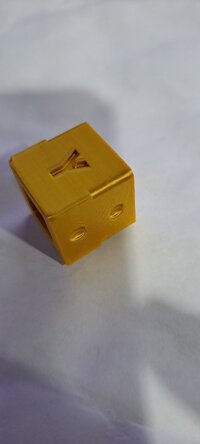
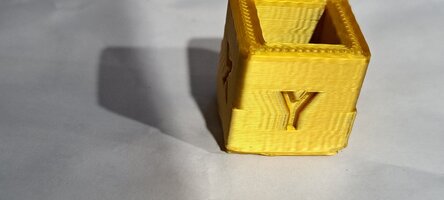
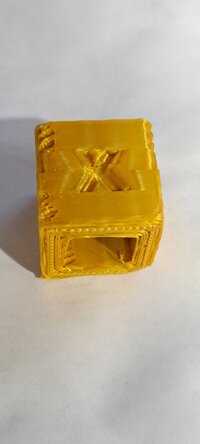
Filament is a gold silk that amplifies surface defects
Was only achieving 38mm/s wall speeds - need to up acceleration and retry
just wanted to confirm with you - i pulled it from some reddit post about sprite pro setup - did you use same settings?
[extruder]
max_extrude_only_distance: 200.0
step_pin: PB4
dir_pin: PB3
enable_pin: !PC3
microsteps: 16
rotation_distance: 25.6
#rotation_distance: 34.406 # Initial Settings
nozzle_diameter: 0.400
filament_diameter: 1.750
heater_pin: PA1
sensor_type: EPCOS 100K B57560G104F
sensor_pin: PC5
min_extrude_temp: 170
gear_ratio: 42:12
min_temp: 0
max_temp: 250
pressure_advance: 0.0325
[extruder]
step_pin: PB4 ### Tronxy Specific
dir_pin: PB5 ### Tronxy Specific
enable_pin: !PB8 ### Tronxy Specific
microsteps: 32 ### Tronxy Specific

gear_ratio: 42:12
rotation_distance: 26.359
nozzle_diameter: 0.400
filament_diameter: 1.750
pressure_advance: 0.0525  ### Specific to the nozzle and filament

heater_pin: PG12
sensor_type: EPCOS 100K B57560G104F
sensor_pin: PA1

min_temp: 0
max_temp: 300
max_extrude_only_distance: 350Something is wrong with that config if the head dropped into a printed part.so, klipper is BS for controls. just had a fail - by mistake print head dipped into the printed cube vertically. i killed power.
head is still pressed into the model.
i donot want to raise it manually as i have 2 z axis screws. the klipper console after power on refuses to raise Z saying you need to autohome first. dunno, i had to rotate scrwes by hand, now need to re-calibrate bed as aligment is ruined. this is exactly what manual lcd panel was needed for. sucks.
thx for the config above, getting to it now.
no, i drove it down by mistake myself - pressed wrong icon on the screen. a user error.Something is wrong with that config if the head dropped into a printed part.
Do you have a synchronizer belt between the Z motors?
Either way, kill power and spin the motors by hand - resynch is simply measuring to the frame with calipers and getting them close.
I have printed guides for my Tronxy to run the dual Z motors up against to synchronize.
Assuming you don't have a touch probe - that's a cheap ($40) update that makes your life a lot easier especially if you use different print surfaces.
no, i drove it down by mistake myself - pressed wrong icon on the screen. a user error.
but after that - it was kaput.
stil recalibrating bed now, what a fecking nightmare. it was perfect.
i have touch probe, use calipers to measure - the calibrated bed result now comes up still warped sideways and diagonally, trying to troubleshoot why.
![[banghead]](/xen/styles/default/xenforo/smilies.vb/045.gif "Bang Head [banghead]")
kinda almost got it back, and had to redo z offset in the end - it rips plastic now off, well, i think i got the routine, will fix it.
That sucks - mine is pretty much down to the glass flatness ( 0.067mm to 0.037mm on corners so pretty much in the noise)
 www.klipper3d.org
yep, the guide i used conveniently skipped the part that you need to add a new section into the printer.cfg for g10/g11 to work.Looks like you have hardware retraction set in CURA
Tune pressure advance for your filament and set retraction in CURA to something small like 0.75mm
If you want hardware retraction:
Configuration reference - Klipper documentation
I just did the pressure advance tuning and set my retract to 0.75mm in CURA - even on a stringy filament I have no issues.yep, the guide i used conveniently skipped the part that you need to add a new section into the printer.cfg for g10/g11 to work.
i am confused now - if you use different materials, does it even matter to have this BS done with a hardware retraction? how am i supposed to know if i want it or not? i can of course just hardcode it in the printer.cfg to be 1mm speed 45 for everything and it will most likely work. i did tune pressure advance.
now was it supposed to be re-tuned an redone now with the hardware retraction to be activated?