• If you enjoy the forum please consider supporting it by signing up for a NES Membership  The benefits pay for the membership many times over.

Cerakote setup Mk2

Golddiggie

NES Member
Joined
Dec 9, 2012
Messages
15,605
Likes
7,503
Location
Pelham, NH
Feedback: 48 / 1 / 0
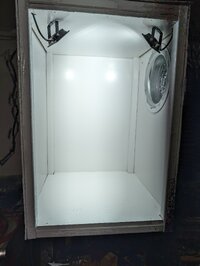
Getting setup to apply Cerakote again, after more than a few years of not doing it. First step has been getting a new spray booth built. The old one was made using 1x2 for the frame. Too flimsy for me after all this time. So that ended up going out into the trash, along with parts I wouldn't be reusing.

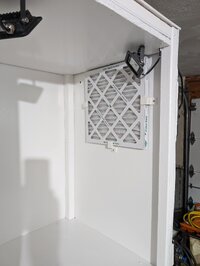
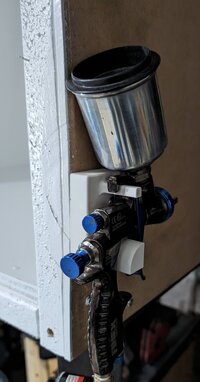
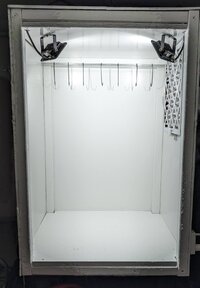
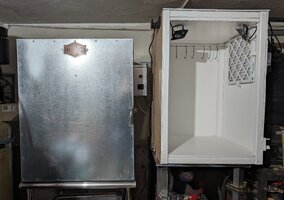
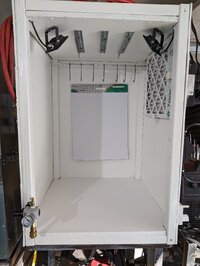
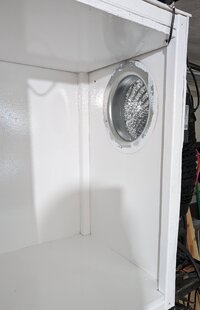
New spray booth was made with 2x2 for the frame. Used two pieces of plywood (either between 1/2" and 3/4", not 100% sure right now) for the top and bottom. Used some 1/4" board (MDF IIRC) for the sides (left, right and back). Got a 10" duct flange installed in the right hand side, with a 14" HVAC filter covering it. Designed and printed parts to hold the filter in place (compared with just using screws before). Those are designed to simply rotate out of the way and allow me to easily change out the filter. I used a full quart of oil based enamel paint (normally for cabinets) on the inside of the thing (white as shown). Installed a pair of 20W (1500 lumen each) LED lights to be able to see what I'm doing. Also printed out an item to hold the spray gun when not using it. Put a pair of handles on either side (on the lower frame) to make moving it easier. The lights are brighter than show in the pictures, due to how the camera adjusts.

With the handles on the spray booth, I'll be able to move it onto a wire mesh cart I have (that the fan is currently sitting on) if needed. All depends on how it and the oven play next to each other. If I can get things to stay setup in the garage for the majority, then I won't need to move it around. Well. other than when I want to do some welding (booth is sitting on my welding table). I have another cart with the Cerakote supplies on it. Including a scale to use for measuring out the parts.

Just need to connect the 10" duct couplers to the explosion proof fan that will be used to exhaust the booth when in use. I have two 8' duct sections to connect to it. One is already connected to the spray booth flange. I also need to cut the rod that you see at the back (with the hooks on it) to length. I plan to use some retaining pins on it so that it doesn't slide out of it's home. I have enough material on hand to make two more rods if needed. I also picked up a 6 pack of filters, so I should be good to go for a while.

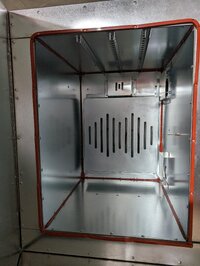
Waiting for the new cure oven to ship out from Light Armor Ovens (their benchtop/mini model). I have a table already setup next to where the spray booth is currently sitting for it. Also have help lined up for when it comes home to get it out of the shipping crate and onto the table. Due to where I live, getting direct delivery isn't an option with freight. So, I'll be picking it up from ManchVegas in another week or two. Estimated to ship out before the end of this week.

Once the oven shows up, I'll be about ready to start spraying and curing. I have a few items I want to do, of my own, first. Mostly to dial in the setup.

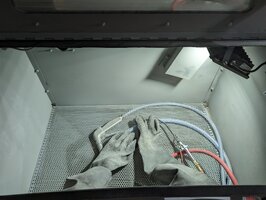
The dry air that will feed the spray gun will come from behind me when in use. I already have a 10' air hose ready to go (hanging on the left side of the cabinet). I also modified my media blast cabinet to include a T fitting at the air inlet (inside) so that I can have a dust spray gun to help clean parts off when done. With the dust collector connected to the media blast cabinet, it made more sense to add that. Just using a 3' hose there, along with an older air spray gun I had hanging around. Not using any QD connections inside the cabinet, for obvious reasons. I have another 3' hose coming to go from the 'almost super dry' air feed to the cabinet.

Pictures:
PXL_20240104_004023026.jpg PXL_20240104_155230607.jpg PXL_20240104_203033897.jpg PXL_20240104_205244387.jpg PXL_20240105_004337912.jpg

I'll update the thread as more progress is made, or when the oven arrives and is in position.
 
Booth interior dimensions are 24"x24"x31.5". I could have put the top/bottom plywood on the outside of the frame, but I wanted a single solid surface on the bottom and it made more sense to do the same for the top. I might remove the 1/4" MDF from the top so that the entire thing will slide under the garage door rails (on the welding table) so it uses less space when 'resting'.

I'll post up, later, what colors I have on hand. I only ordered up some 4oz bottles to start off with. Not as cost efficient to purchase, but I'd rather not have the stuff hanging around for too long (like the last time I ordered the stuff).
 
So you can get an upper in there diagonally no problem that's sweet.
You never do an upper completely setup anyway. You always break down whatever you're going to spray to single (no moving) parts.

I've done full rifle sets in my old setup. Even in my old oven which was just under 24" long (max inside dimension). IIRC I was able to 'fit' a 26" barrel in there with some creativity.

With the coming oven, and the spray booth, I should be able to handle just about anything used in this region. Once properly prepared. My media blast cabinet is also more than sufficient for that aspect. I'll take some pictures of that over the coming days.
 
I'm also going to make some hardware to help hold lower's (using the grip screw hole) to make it easier this time around. I have enough material (round aluminum stock) to make at least four of those. Will just need to fire up the milling machine to make the holes in the pieces, as well as profile them as I want. I'll probably end up making more 'holding' items as I see the need.
 
Looks like the oven is shipping out either this afternoon or tomorrow. Got an email from Light Armor to confirm I'm picking it up from the freight terminal (before they ship it out).
 
Oven shipped out yesterday. Freight company tracking shows it arriving tomorrow. :oops: Will see IF it will be ready for me to pickup tomorrow sometime in the afternoon, or if I'll need to go up on Monday. At least there's no rain/snow in the forecast for either day (at this time anyway).
 
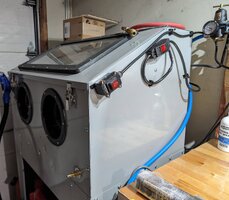
Media blasting cabinet setup:
PXL_20240110_210306620.jpg PXL_20240110_210353191.jpg PXL_20240110_210333999.jpg PXL_20240110_210341323.jpg
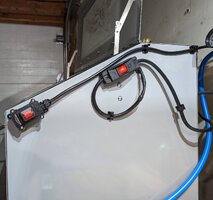
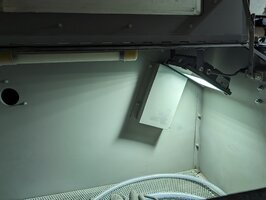
Switch on the side of the cabinet, to the front, is for the dust extractor unit. Switch further back is for the light inside the cabinet. Third photo (from the left) has both the blast gun (upgraded at purchase to carbide nozzle version) as well as the air hose and spray gun to hit what's been blasted before removing. Don't recall the power level of the LED light I installed. I do know that it's FAR better than the tube light that came with the cabinet when I bought it years back (not LED). Provides more than enough light to see everything inside (as you can see). Switches are attached using 1" wide VHB tape.

Dry air side setup:
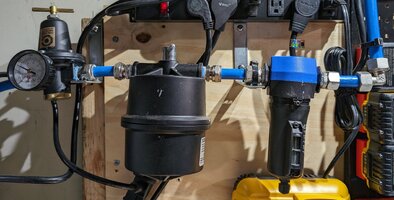
From right to left: water separator, coalescing filter, regulator.
PXL_20240110_210415147.jpg

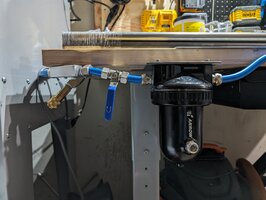
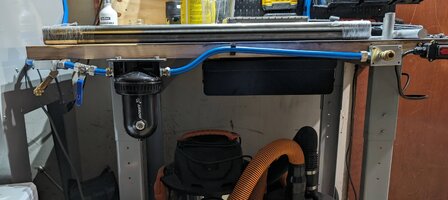
From left to right: Tool port (for blast cabinet), ball valve, air dryer (color change media).
PXL_20240110_210424913.jpg

Far right: Tool port to feed Cerakote spray gun with ultra-dry air.
PXL_20240110_210441915.jpg

Blue line is MaxLine 1/2" hose (with associated fittings). I went with this over the old DOT level tubing since it can be bent to shape, and it retains that shape (plastic inside and out with an aluminum core). Plus it's rated for 300psi. My compressor only goes up to 135psi.

Trying to decide if I'll allocate one of my older tablets, or computers (either the old Surface Pro 4, or my previous laptop) to the basement/garage. Most often it will be used for the Cerakote mix calculation page. Leaning more towards the tablet (Android) option.
 
Tracking info for the oven has it at one stop away from the terminal (in ManchVegas, just not the final spot in ManchVegas). With any luck, I'll be able to pick it up tomorrow afternoon. Otherwise I'm thinking Tuesday, depending on the weather.

Got some additional colors coming as well. Only getting the 'tester' size right now so that I can see IF the color is something I'll use enough of to get the larger size of. Going with mostly the Elite colors at this point, but some of the H series as well (both oven cure). If there's a need, I could get some of the air cure, or other formula that's high temp tolerant (up to 1800F). That might have use for suppressors. Well, as long as you don't run them so much that they farking GLOW. ;)
 
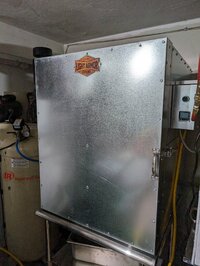
Oven arrived at the freight terminal, which called me this morning. Picked it up this afternoon and got it into position a little while ago. I needed a second person to help get it off the pallet, out of the truck, and onto the table it's sitting on now. Had to send a message off since the power cord (and wall outlet) that were part of the order didn't arrive with it. Waiting to see what happens with that part.

Pics:
PXL_20240115_225445870.jpg PXL_20240115_225512407.jpg
 
Better picture of the oven (taken this morning).
Oven.jpg

Using the cord for my portable generator for now. Will see what the cord being sent to me is like. I'll either use that one with the generator moving forward, or swap it out. I have the 14-50 to L14-30 adapter on the power outlet being used.

Need to get to work on installing the couplers to the fan so that I can connect up the ducting to it. Plan to get that done before the weekend arrives. Especially since I have another order coming from Cerakote. A couple of other colors as well as some supplies (hooks and such). After this order I should only need to get more colors. I'm looking forward to using some of the Elite mix.
 
Got the couplers installed onto the exhaust fan and the [fan] inlet connected to the spray booth. Not sure if I'll end up using the duct from the exhaust side of the fan, or not, yet. I'll decide come my first use of the setup.

Got plugs for water bottles too. Going to make up something to allow me to hold the bottles via the plugs to make things easier. I'll also set it up so that I can hang them from that same setup.

Colors I have on hand currently:
H-109 Gloss Black
H-219 Gun Metal Grey
H-297 Stormtrooper White
E-100 Blackout
E-110 Midnight
E-120 Smoke
E-130 Earth
E-240 Carbon Grey
E-310 Fire
 
New colors arrived today, a few more are set for tomorrow.

Today:
H-140 Bright White
H-146 Graphite Black
H-171 NRA Blue
H-190 Armor Black
H-234 Sniper Grey
H-293 Vortex Bronze
H-359 Smoked Bronze

Looking to pick up a 'project pew' to work on this week. Found two candidates on Saturday, but didn't purchase yet. Thinking about going out tomorrow to get one, or both, of them. Both are pretty short money (which is good since my budget is LOW).

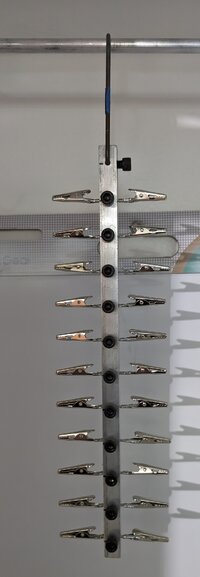
Picked up some punched angle iron from Homeless Despot to add to the spray booth (to hang things from). As well as some regular angle iron to make a rack to hang things while spraying others (it will go on the workbench that will be behind me while spraying). Planning to get started on at least one project item before the weekend is done. I also have a few old pocket knives (bought years ago) that I'm thinking about spraying too.
 
Latest colors to arrive (last for a while) are:
H-188 Magpul Stealth Grey
H-216 Firehouse Red
H-221 Crimson
H-306 Ruby Red

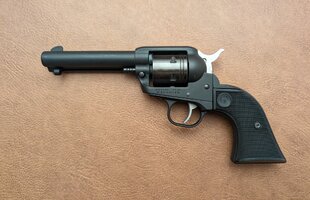
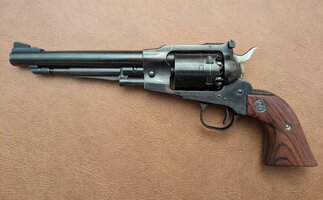
Also picked up the [low cost] project pews this afternoon. An old Ruger Old Army [blackpowder] and Ruger Wrangler. Got something in mind for the Old Army but haven't finalized anything (yet) for the Wrangler.
 
Made some changes to the spray booth late last week and today...

Added the angle iron in the ceiling of the booth to give me more options to hang things. Also put a screw in for the paper pad so that it will be easier to do spray pattern tests. Plus the [small] regulator (on the left) for connecting to the spray gun. Only goes up to 30psi, but that's the ceiling for the formulas I have anyway.
PXL_20240205_200217225.jpg

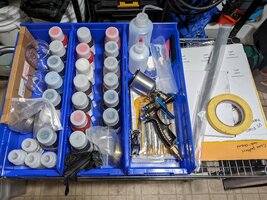
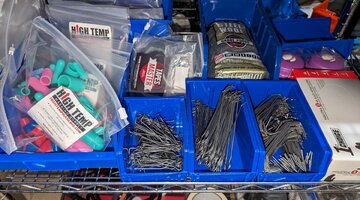
Did some better organization of the Cerakote products to [hopefully] make things easier on me. Already had the hanging hooks in the bins, but used a better one for the plugs. I have a couple more hanging hooks that are not opened up since I'm not sure how often I'll actually use those. I think these are the ones I'll use most often.
PXL_20240205_201251795.jpg PXL_20240205_201423336.jpg

The two project items that I picked up Wednesday of last week:
PXL_20240205_225547999.jpg PXL_20240205_225603723.jpg
As I mentioned in the previous post, I have some idears for the Old Army pistolla... Not solid (yet) for the Wrangler. Post up idears/suggestions if you like. Or PM/DM them to me.
 
Made some changes to the spray booth late last week and today...

Added the angle iron in the ceiling of the booth to give me more options to hang things. Also put a screw in for the paper pad so that it will be easier to do spray pattern tests. Plus the [small] regulator (on the left) for connecting to the spray gun. Only goes up to 30psi, but that's the ceiling for the formulas I have anyway.
View attachment 847200

Did some better organization of the Cerakote products to [hopefully] make things easier on me. Already had the hanging hooks in the bins, but used a better one for the plugs. I have a couple more hanging hooks that are not opened up since I'm not sure how often I'll actually use those. I think these are the ones I'll use most often.
View attachment 847201View attachment 847202

The two project items that I picked up Wednesday of last week:
View attachment 847205View attachment 847206
As I mentioned in the previous post, I have some idears for the Old Army pistolla... Not solid (yet) for the Wrangler. Post up idears/suggestions if you like. Or PM/DM them to me.
Oh man, don’t cerakote that old army!!

Sweet setup though, good luck….👍
 
I will give you a cheap gun to cerakote gold for me if you want to practice.

If that comes out good, I have Storm Trooper White 22/45 that needs some touch up.

Lipsey's Cerakote s*cks a**. I want to re-do it. Whoever did it didn't bother to prep the gun, the plastic safety peels it off and I can see the original finish.
 
Last edited:
Complete listing of colors on hand (as of today):
H-109 Gloss Black
H-122 Gold
H-139 Steel Grey
H-140 Bright White
H-146 Graphite Black
H-171 NRA Blue
H-188 MagPul Stealth Grey
H-190 Armor Black
H-216 Firehouse Red
H-219 Gun Metal Grey
H-221 Crimson
H-234 Sniper Grey
H-238 Midnight Blue
H-245 SOCOM Blue
H-268 Troy Coyote Tan
H-293 Vortex Bronze
H-297 StormTrooper White
H-306 Ruby Red
H-354 Lemon Zest
H-359 Smoked Bronze
E-100 Blackout
E-110 Midnight
E-120 Smoke
E-130 Earth
E-240 Carbon Grey
E-310 Fire

Need to finalize the plan for the project revolvers. Also looking at a couple of my other pistols to spray. Two of them have had their slides machined, and have unprotected steel showing.
 
Quick question, when spraying an 80% ar lower, does the inside as well as outside along with drilled holes get cerakoted ? Wondering about pins etc fitting ?
I've always done a full spray for any completed 80& lowers. Enough gets into the FCG pin holes to protect the metal there. I've also just gone for raw 80's so that it's easier to both finish the machining as well as get the machined areas protected.
 
Looking to have some plastic magazines sprayed. You taking work? Message me if so
 
Quick question, when spraying an 80% ar lower, does the inside as well as outside along with drilled holes get cerakoted ? Wondering about pins etc fitting ?
He sprayed my 22/45 lower. We didn't cover pin holes or the holes for the grip screws. ZERO issues.

Golddiggie has a nice set up.
 
Back
Top Bottom