I removed the mil spec dust cover from a new Spikes Tactical upper, and then installed a Strike Industries billet aluminum one.
With the upper pinned into my DPMS Panther Claw block, I installed a Faxon 7.5 inch 300 Blackout 1:8 twist gunner profile barrel.
This was a bit of a pain in the ass because it turns out the barrel nut for the Strike Industries "Strike Rail" that I was going to be putting on only has five slots around its circumference for the gas tube to pass through.
This means when torquing the nut you may have to travel as far as the whole 72-degrees between slots. That would be okay if Strike had supplied a sufficient variety of barrel nut shims, but they didn't and using what they did give me I still ended up having to torque all the way up to 50 ft.lb. to get a slot lined up.
After getting the barrel set I installed a Kratos Designs Group gas block that I got for $35. First time I have ever used one, it seems very well machined and it has a witness hole for aligning the gas port, came with a spare cup screws and spare gas tube coil pin both of good quality. Gas tube is Expo Arms pistol length.
The Kratos Design Group Gas Block is CNC machined from precision ground 4140 steel bar stock. Featuring a .750 gas journal and a QPQ finish it is an incredibly robust low-profile gas block. Witness Hole to Verify Gas Port Alignment Machined Shelf for Pinning To Barrel Front of Gas Block…

www.kratosdesigngroup.com
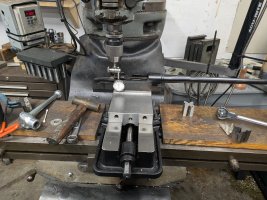
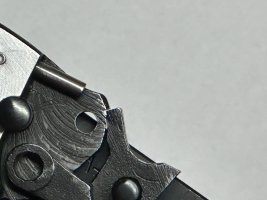
I switched from the Panther Claw to the Magpul BEV block to install the Midwest Industries 5/8-24 Blast Can . Notice the bolt carrier with the bolt removed which locks the upper into the BEV block along with a temporary pivot pin.
Now technically you don't need to time this type of muzzle device but I wanted the flats on the sides and the MI logo at the top so I used a crush washer and had to go to about 40 ft.lb. which is kind of pushing it but I am hoping the washer absorbed it and I didn't start to constrict the barrel.
And here is the finished upper with the 7 inch Strike Rail installed. I would have liked the rail to be a little longer but the next size up is 10 inches and that would have been too long.
After adding a PA SLx 25mm red dot this is going to be a 7.5 inch 300 Blackout home defense option.
BTW this is a caliber swap for an existing tax stamped SBR, so suck it Maura.